Tutorials • Apps
Automatic configuration of an email inbox in Gmail on Android
In this tutorial, we will go through the necessary steps to set up an email inbox in the Gmail application on Android operating systems.
2
Views 2589Updated 2 aniPublished on 08/06/2018by Sebastian S.
Introduction
- Most operating systems Android come with the Gmail email client installed.
- In the tutorial below, we will present the steps necessary to configure a mailbox through the automatic option.
- We will use the example configuration office@demo.hostico.ro
Requirements
- Email account login credentials.
- The Gmail app installed on the smartphone.
Steps
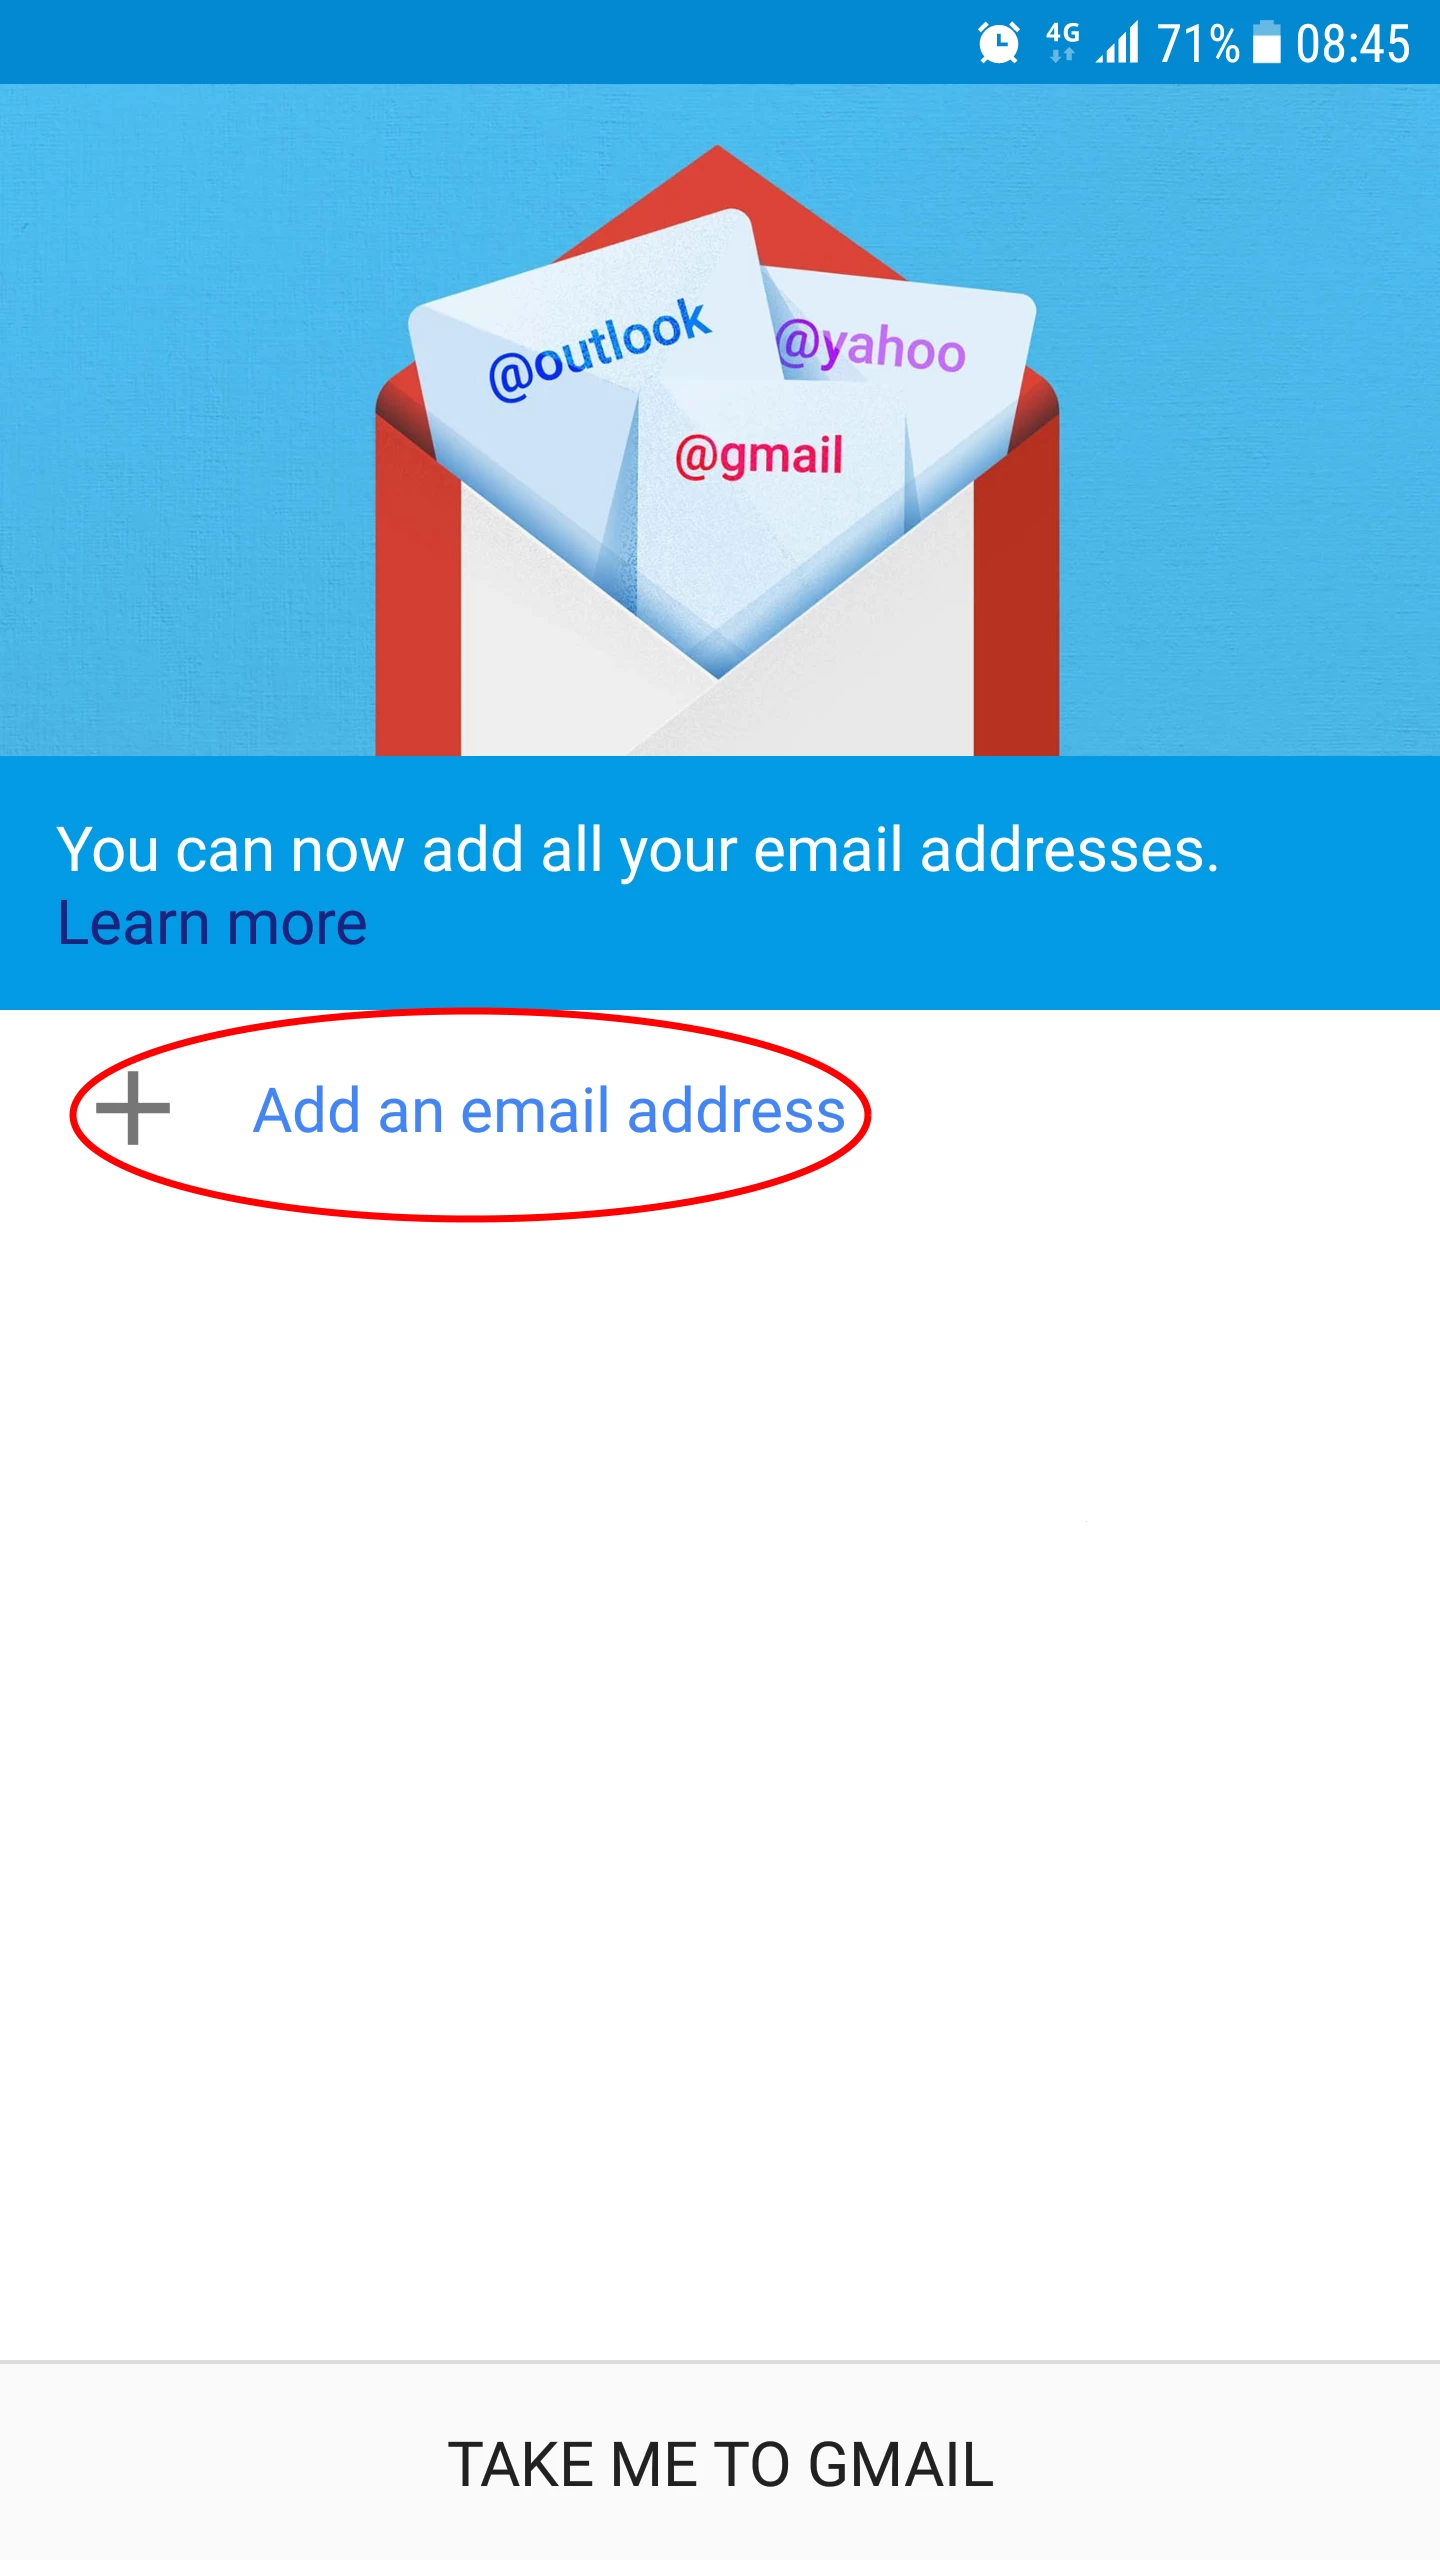
- We open the Gmail app.

- We select Add an email address.
- Select Other.

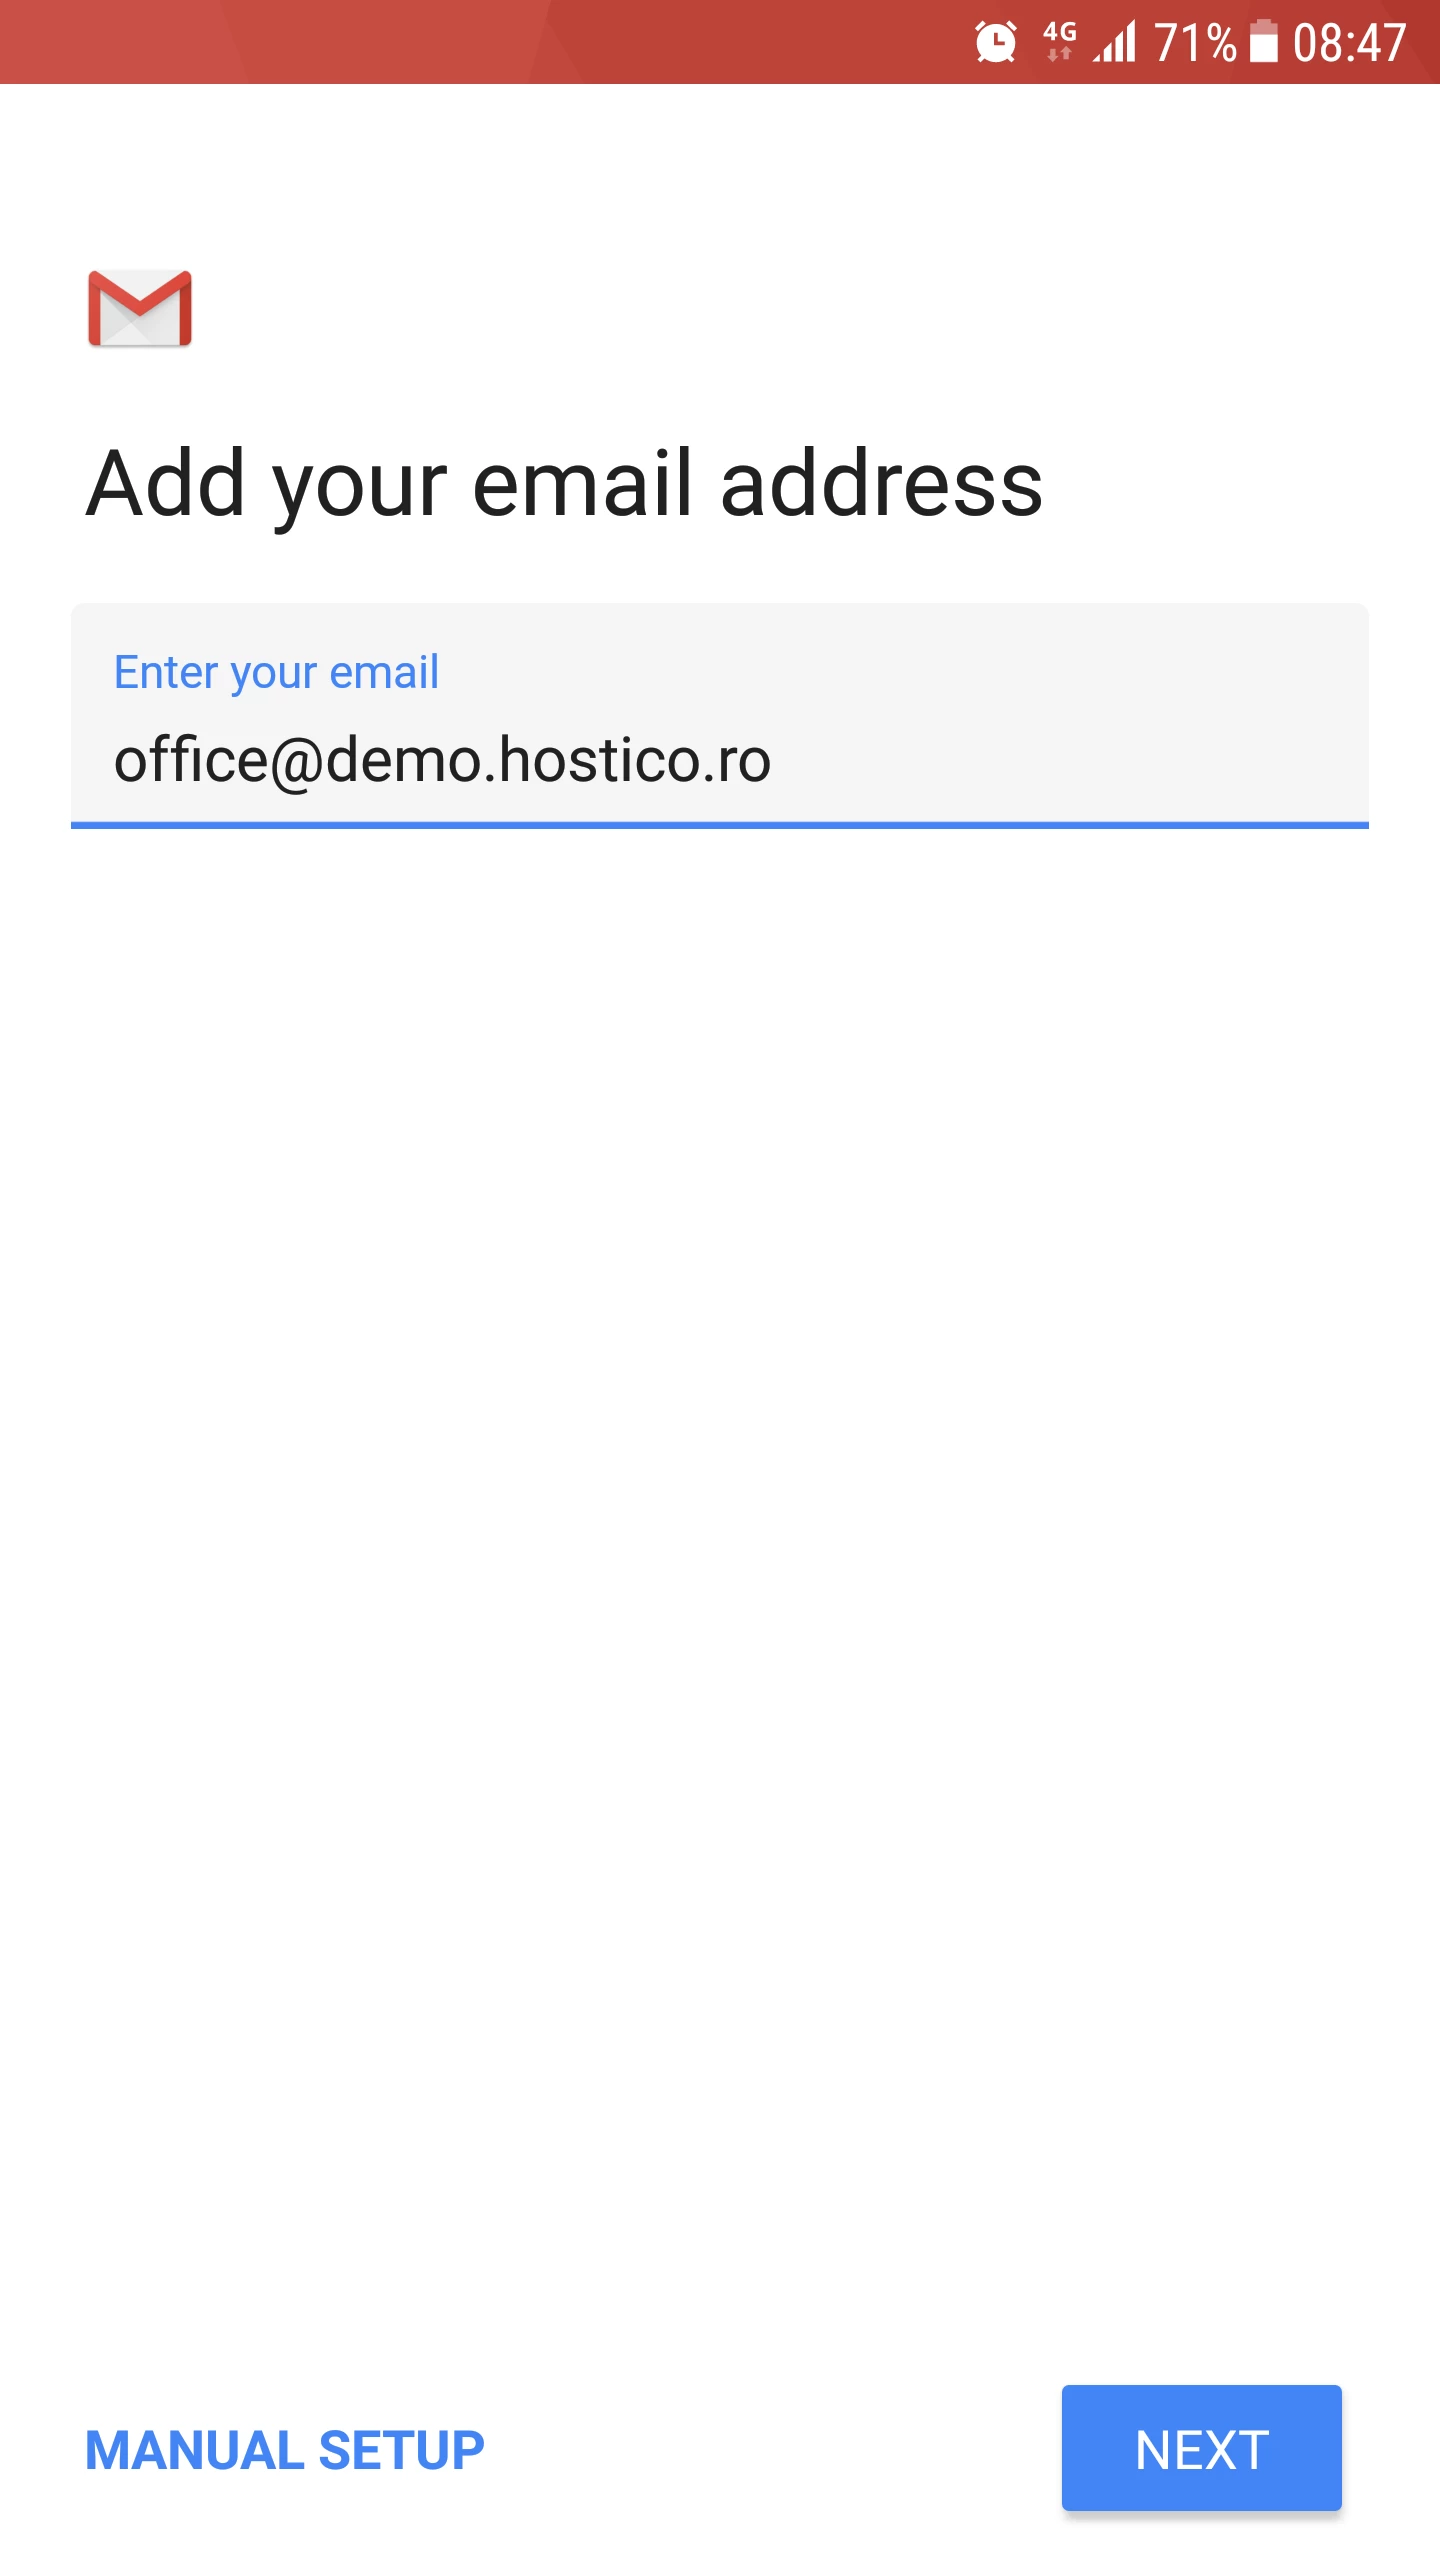
- We enter the email box in the field, after which we click the Next button.
- In the next window, we will have to choose between:
-Personal (POP3) (by selecting this protocol, emails will be downloaded to the device and will no longer be stored on the server).
-Personal (IMAP) (by selecting this protocol, emails will remain stored on the server and will be synchronized with the device).
-Exchange (for Microsoft Exchange mailboxes).
- If we want to set up the mailbox on multiple devices, it is highly recommended to select the IMAP option.

- On the next page, we will be able to enter the email account password, after which we press the Next button.

- The default settings (detected by the Gmail application) for the incoming mail server (emails coming into the inbox) will be loaded. We will press the Next button.
- Normally, the application correctly detects the email server. If, after pressing the Next button, we receive any connection error, we can try changing the email server address in the Server field (the 3rd field) to one of the following:
-mail.domain.tld (your domain with the prefix mail).
-domain.tld (just your domain without any prefix).
-the hostname of the email server (the name of the email server).
-the dedicated IP of the email server.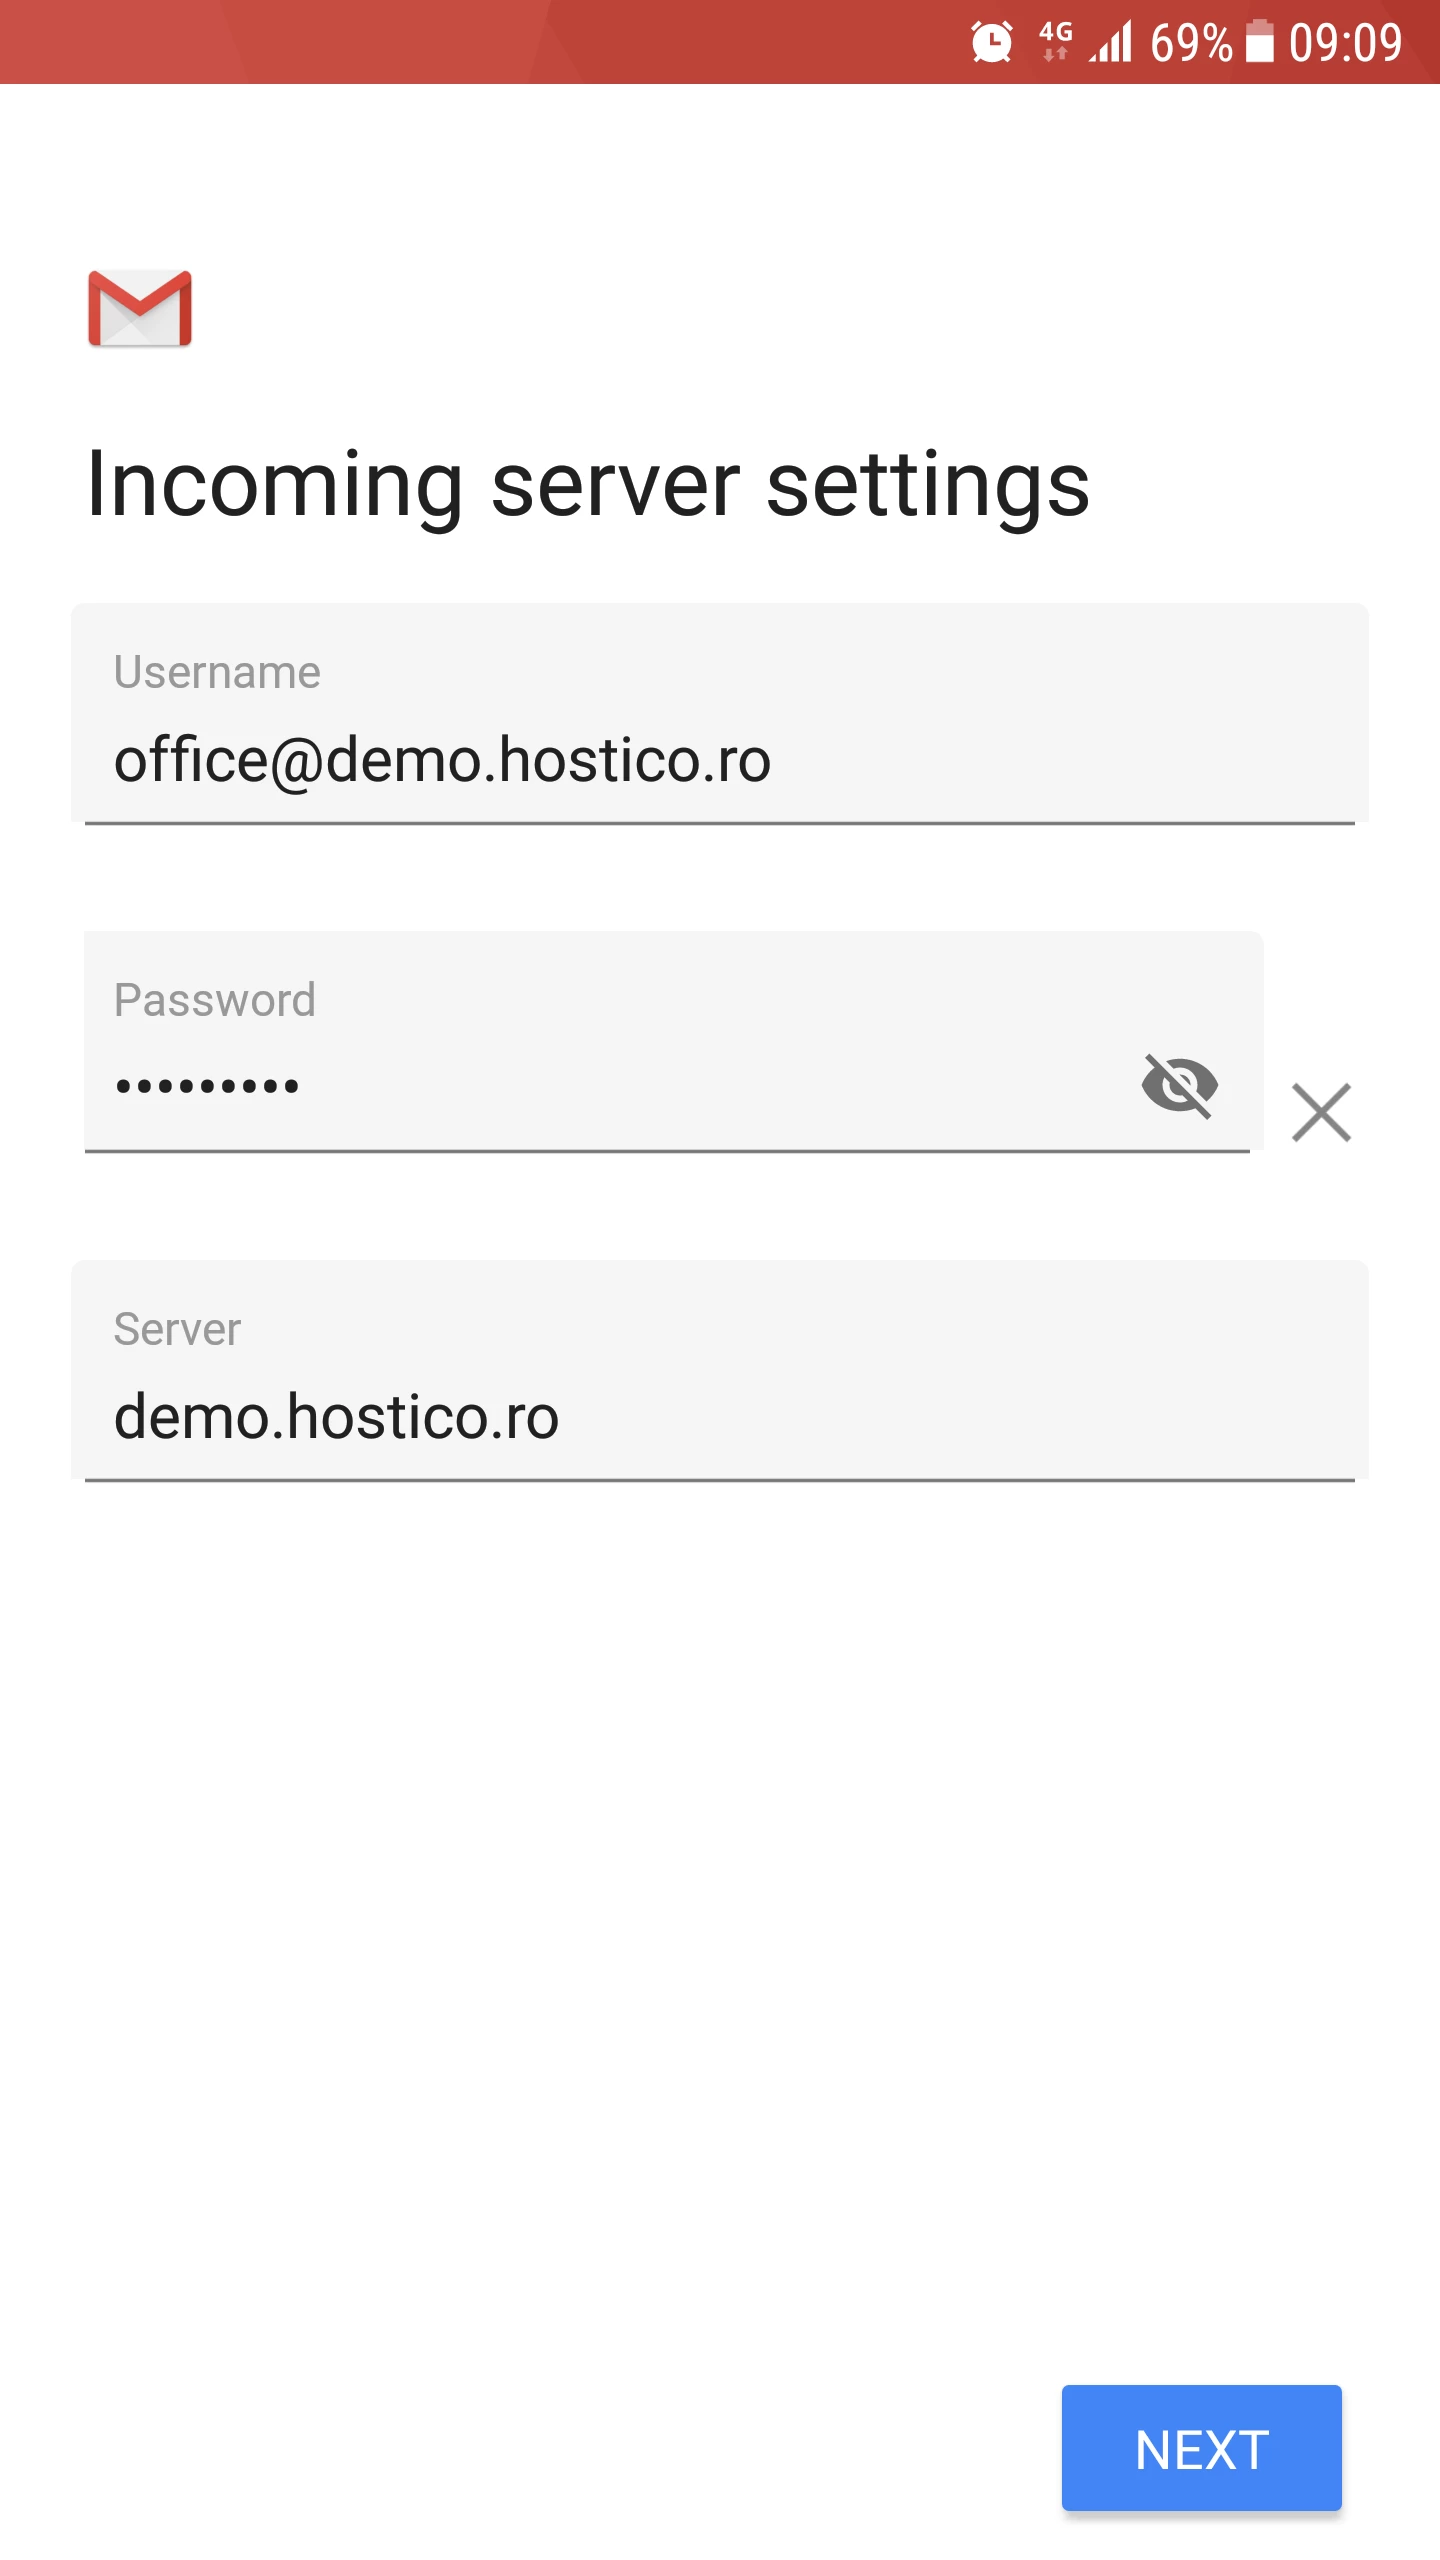
- The default settings (detected by the Gmail application) of the Outgoing server (emails sent from the inbox) will be loaded. We will press the Next button.
- Just like on the incoming server, in case of a connection error, you can try modifying the SMTP Server field (the 3rd field) to one of the options specified in the previous step.

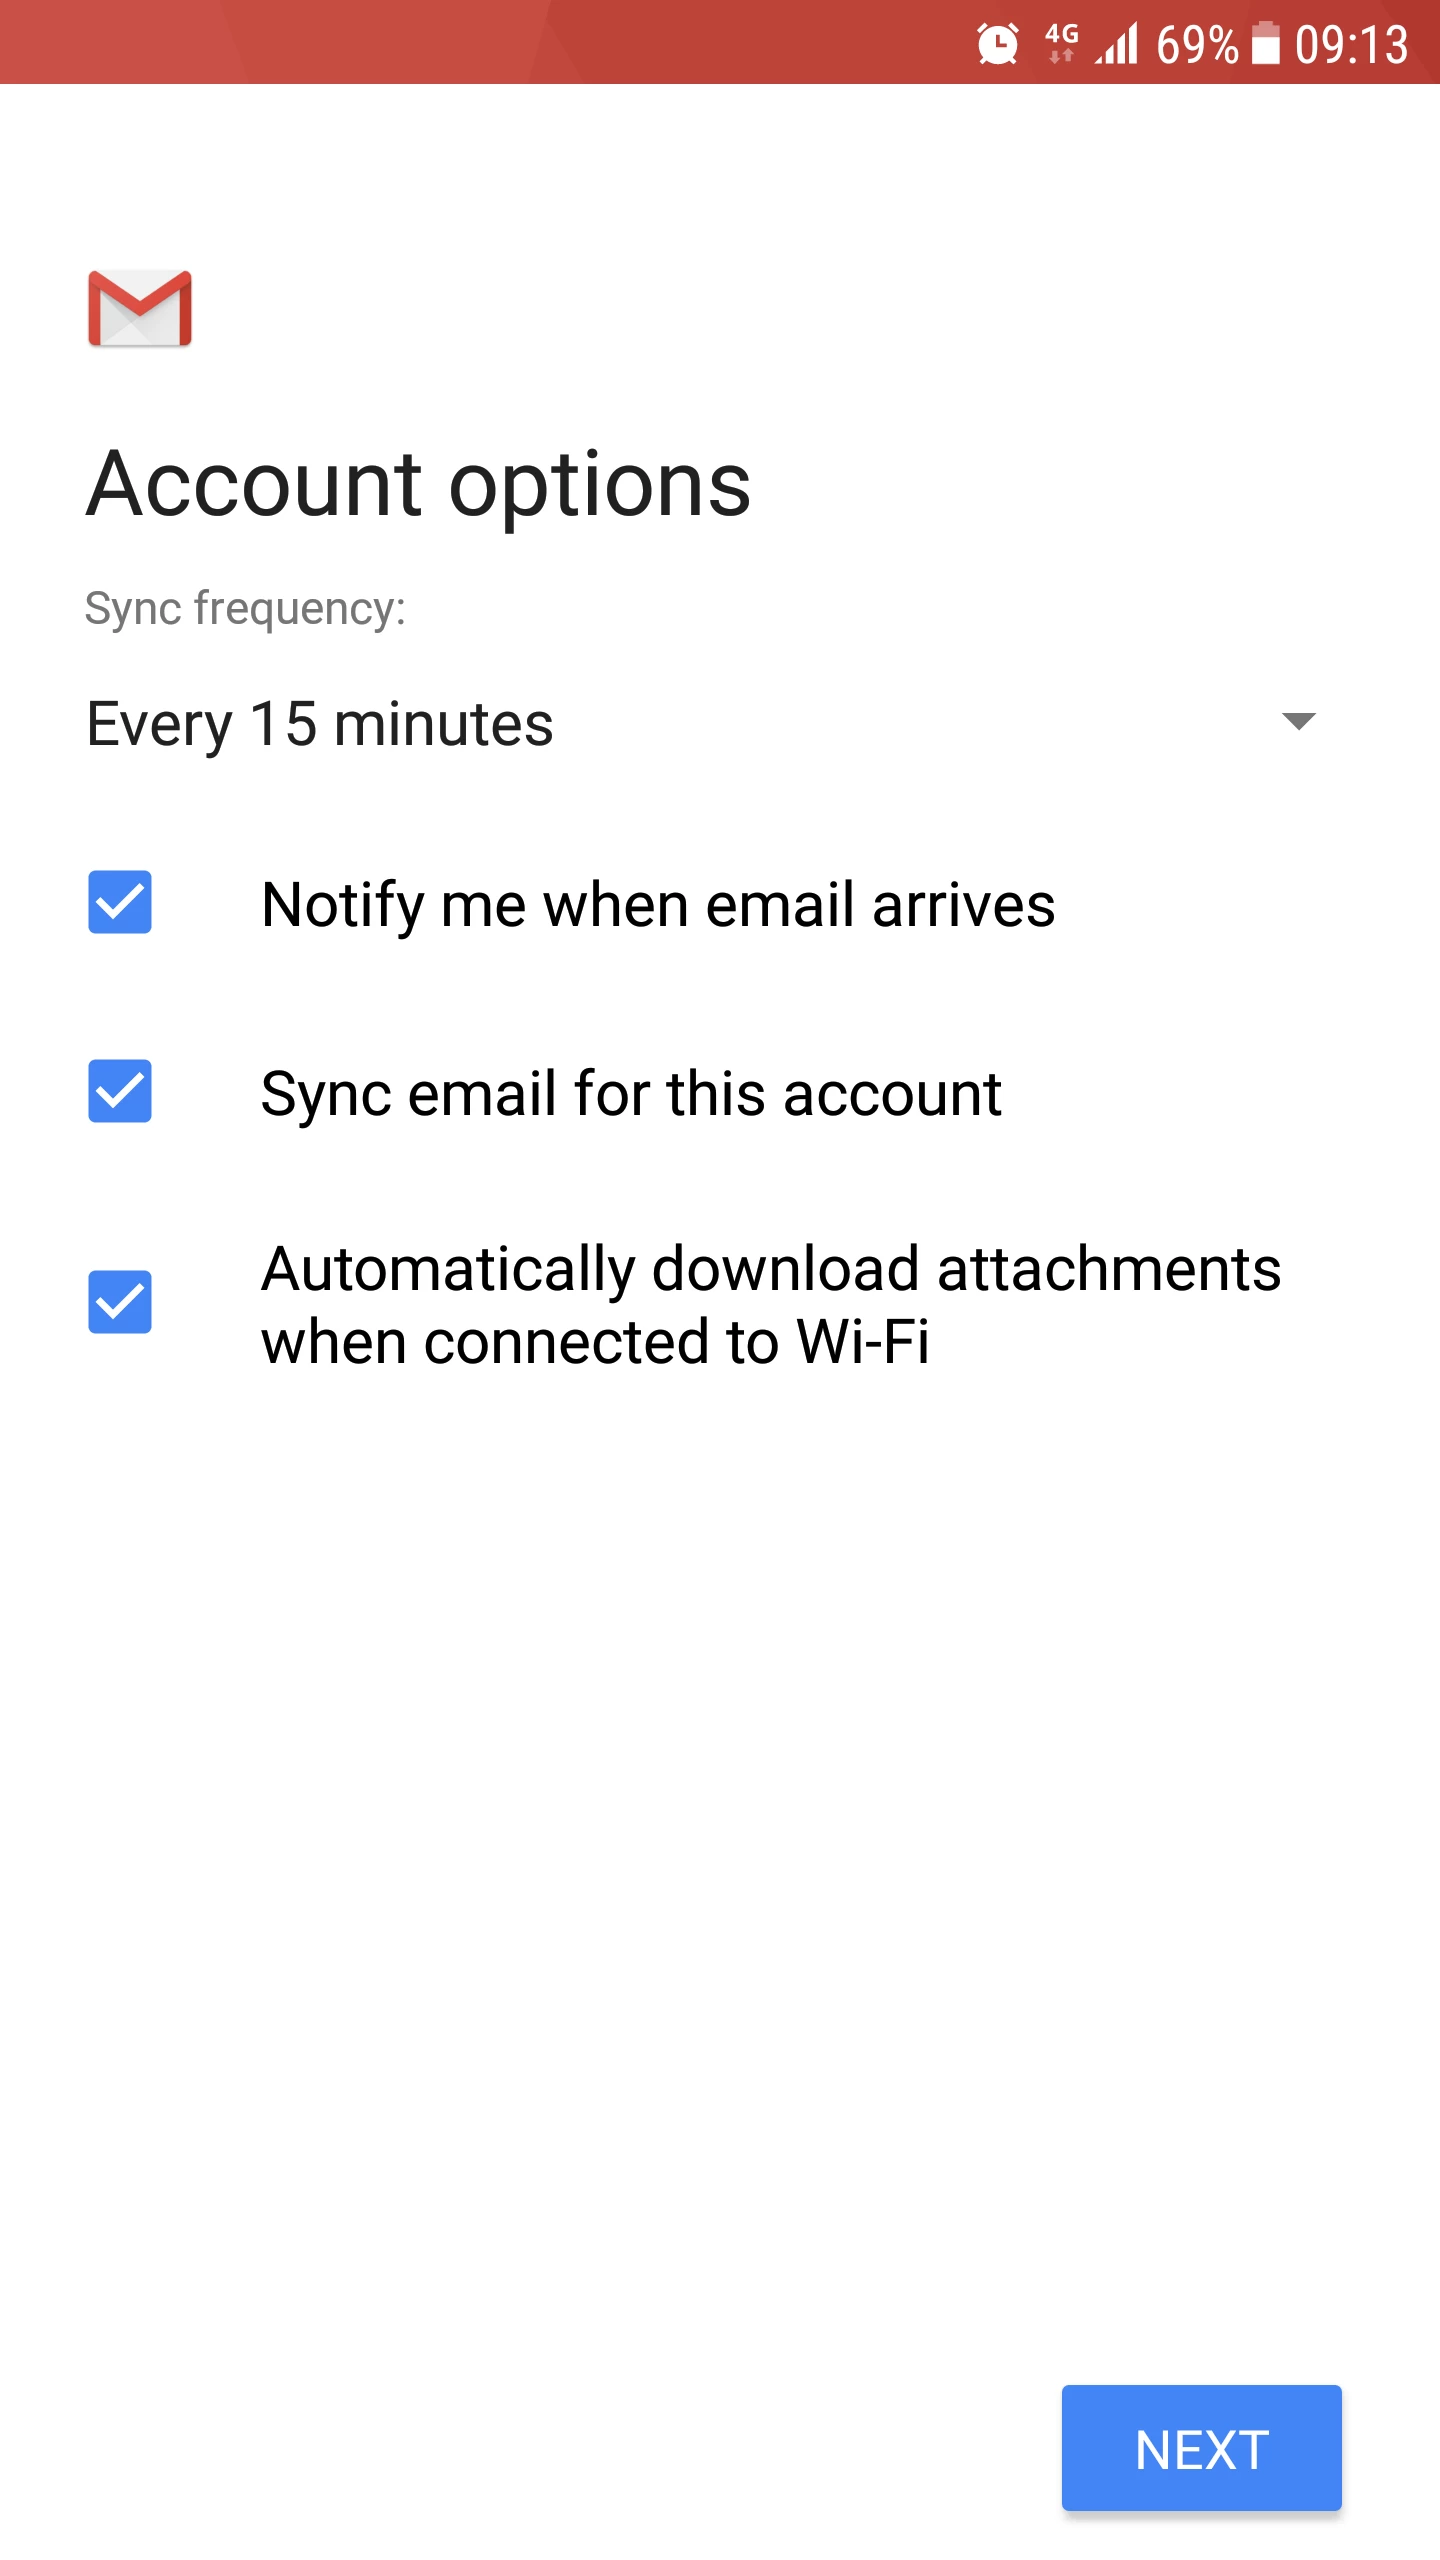
- On the next page, we will have the option to customize some settings of the box. We will press the Next button.
- If everything went smoothly, we will be greeted with a success message. In this window, we will also be able to set a name that will appear in the From field at the destination. To complete the process, we will press the Next button.

- The main menu of the Gmail application will load. To see the inbox, we will press the Take me to gmail button.
- From this page, we will be able to send and receive emails from the newly configured mailbox.