Tutorials • Dev
Generating keys for SSH connection using PuTTYgen on the Windows operating system
In this article, we will present the necessary steps to generate the keys we need to connect via SSH.
1
Views 2222Updated 1 anPublished on 10/09/2018by Sebastian S.
Introduction
If you want to connect to a hosting package via SSH, you need to use an SSH key pair. The private key will be uploaded to the SSH client application, and the public key will be sent to help@hostico.com for access configuration. More information about SSH access and what needs to be sent via email can be found by visiting the link: Do You Provide SSH Access?.
For generating the SSH key pair on Windows operating systems, several programs can be used, however, the most frequently used application is PuTTYgen, included in the installation of the SSH client PuTTY.
Requirements
- Installing the PuTTY application, available at the following link: www.chiark.greenend.org.uk .
- Download the appropriate version for your Windows (x32 or x64) from the MSI ('Windows Installer') section. It is recommended to keep the default settings during installation.
Steps
- Launch the PuTTYgen application. By default, it can be found at the path:
C:\Program Files\PuTTY\PuTTYgen.exe.
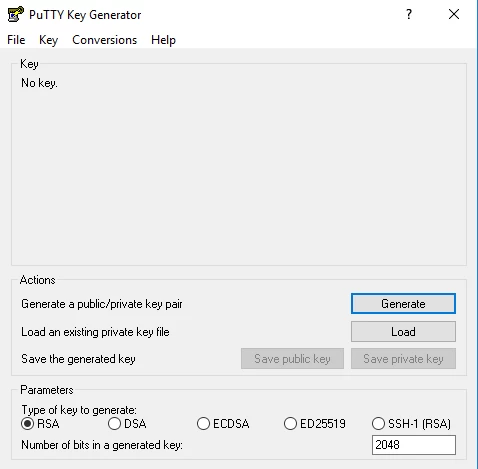
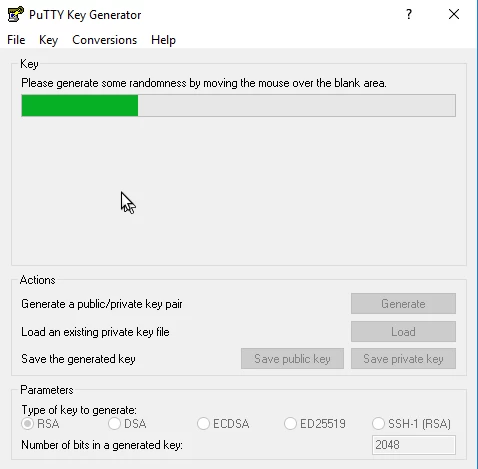
- Make sure that the RSA option is checked at the bottom of the window. Click on Generate and move the mouse randomly in the area within the Key box until the progress bar is filled.
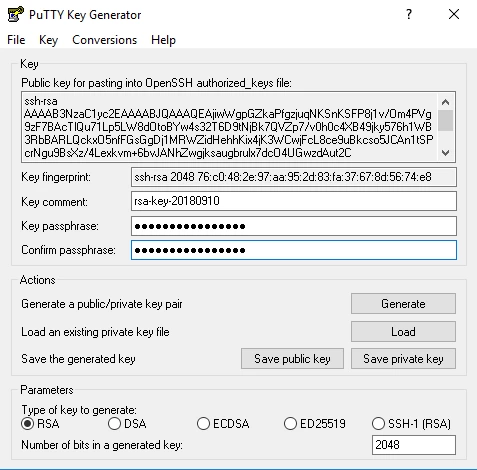
- After completion, the application will generate the key pair. From the displayed window, the following fields are important:
- Public key for pasting into OpenSSH authorized_keys file: Copy the string from this field and send it to help@hostico.com for access configuration.
- Key Comment: Enter a comment, for example, the name of the server for which the key is used.
- Key Passphrase: Enter a password for the private key. It is recommended to set a password for added security.
- Confirm passphrase: Enter the password again for confirmation.
- Save the private key by clicking the Save Private Key button. Save the file in a safe location, as it will be used for login.
- It is recommended to save the public key using the Save Public Key button. If necessary later, you can open the file with Notepad to copy the public key again.
- After configuring SSH access, you will receive confirmation from the technical department. You will be able to use PuTTY or another SSH client to connect, using the access data and the private key.